Overview
About This Club
- What's new in this club
-
.thumb.jpg.c1e9ab9cb8b14686645a0f4d4fd13aa0.jpg) Woman_At_The_Well joined the club
Woman_At_The_Well joined the club -
 kelsey777 joined the club
 -
 April_Stoltz joined the club
 -

Applesauce bread
missmuffet replied to missmuffet's topic in Cooking club's What's your favorite recipe?
Just made it yesterday. It is good. -

Applesauce bread
angels4u replied to missmuffet's topic in Cooking club's What's your favorite recipe?
I printed the cake recipe :) Looks healthy! -
Applesauce bread
angels4u replied to missmuffet's topic in Cooking club's What's your favorite recipe?
Have to try that cake :) -

Applesauce bread
ladypeartree replied to missmuffet's topic in Cooking club's What's your favorite recipe?
cant say I have ever noticed it but di have to be careful due to coeliacs disease Thank you for posting this -
Applesauce bread
missmuffet replied to missmuffet's topic in Cooking club's What's your favorite recipe?
Quinoa is a seed that acts as a grain. Maybe you don't have it where you live. If you do decide to use it I definitely would get it organic. -
Applesauce bread
missmuffet replied to missmuffet's topic in Cooking club's What's your favorite recipe?
You could replace the oats with quinoa. -
Applesauce bread
missmuffet replied to missmuffet's topic in Cooking club's What's your favorite recipe?
You could try that. -
Applesauce bread
angels4u replied to missmuffet's topic in Cooking club's What's your favorite recipe?
Maybe we can cut back on the oil and replace sour cream with thick yogurt? -
Applesauce bread
ladypeartree replied to missmuffet's topic in Cooking club's What's your favorite recipe?
Thank you it sounds delicious Now I will have to try and find something to replace the oats or wait till the holidays when I can make it for the grandchildren -
1 cup white sugar ( I cut down on my sugar and use 2/3 cup of brown sugar) that is your choice 1/2 cup sour cream 3/4 cup oil 2 large eggs 1 cup unsweetened applesauce 1 tsp vanilla 2 cups of flour 1 cup oats 2 tsp baking soda 1 tsp cinnamon Chopped nuts(optional) 1/4 tsp salt 1. Preheat oven to 350 degrees. Oil loaf pan. 2. In medium bowl whisk together sugar,sour cream,oil,eggs.vanilla and applesauce. 3. In large bowl combine flour,oats,salt,cinnamon and baking powder. 4. Add wet ingredients to flour mixture. Stir until combined. 5. Pour batter into greased loaf pan and bake for 75 minutes. 6. Let cool.
-
 Sweettoothsis joined the club
 -
 ESJ joined the club
 -
 Godshand joined the club
 -
 ChocolateVanilla joined the club
 -
 Cybermom joined the club
 -
 JustaLady. joined the club
 -
 RealReligionofPeace joined the club
 -
 BonnieJoy joined the club
 -
 I made a different version yesterday, added diced tomatoes, mushrooms, shrimp, and carrots. I don't know that I would say that it was an improvement in enjoyment, but it did not hurt either! i also put the raisins in a bowl with some water and warmed it slightly (low power in a microwave) then let it sit for and hour of so to let them plump a bit (then drained the water). That was nice. I mixed the mayo (which was made with avocado oil) and the vinegar, and then added a few drops of liquid sucralose to taste - that will be my default in the future.
 -
Oven Roasted Little Red Potatoes
ladypeartree replied to Omegaman 3.0's topic in Cooking club's Taters!
You can also cook them in a microwave .. I just put them into a microwave bag , add herds ( usually garlic and rosemary or mixed herbs ) add a lump of butter and microwave for about 10 to 20 mins depending on how many in the bag ... if they are big you can slice them in half or poke holes in the skin with a fork so the skins dont burst- 1 reply
-
- 1
-

-
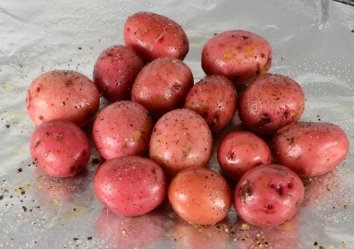
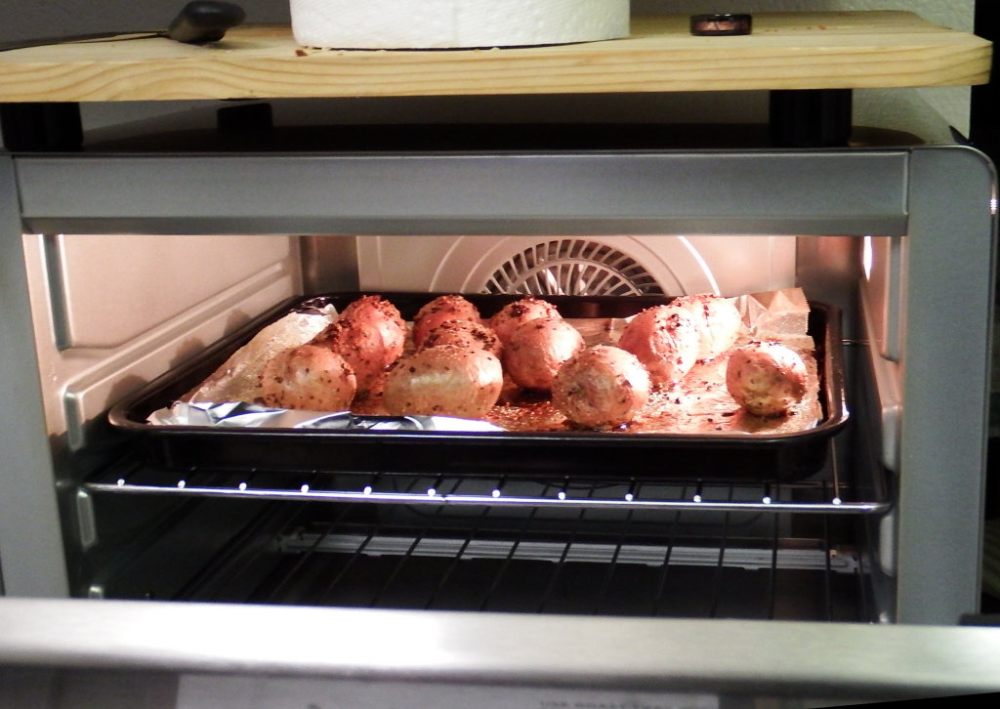
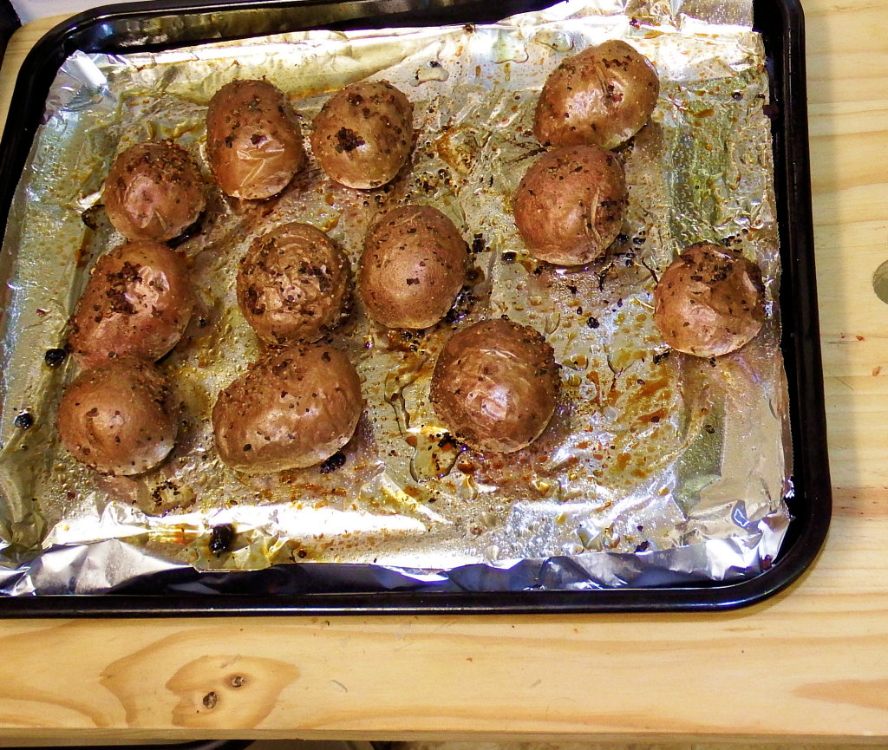
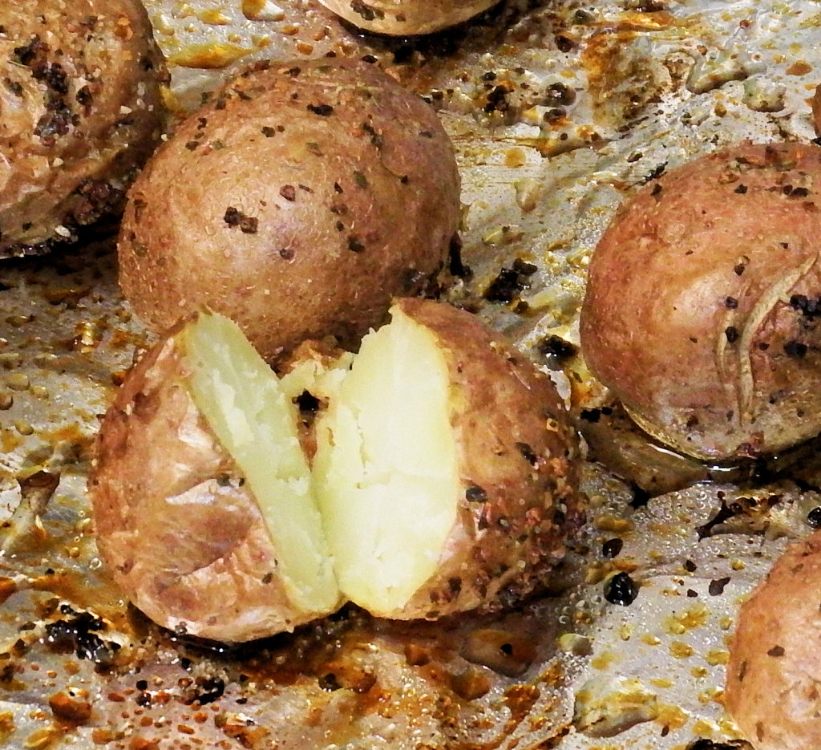
I keep buying bags of these little red potatoes. I keep throwing out these bags of little red potatoes. I don't seem to get around to using them. Tonight, that changes. As I am typing this, I am roasting a dozen little red taters. I don't know how they will come out, but I am confident they will be fine, though the recipe may need to be adjusted to get it just right. My hope is, that not skinning (peeling) and not slicing/cutting the potatoes, will encourage me to make these more often. The less I have to prep and clean, the more likely I am to do something. So far, I have taken a small bowl, and put in 1/4 cup of olive oil, and added a little salt, some fresh ground black pepper, some dried oregano, dried basil, and dried minced garlic. I stirred all that together in the bowl, and let it sit awhile, so that the dried ingredients would absorb some of the oil. The picture shows 15 potatoes, but the 1/4 cup I specified, was good for about a dozen (12). At first, I put all the potatoes in the bowl, and thought I could use my hands to maneuver them around until they were evenly coated with the oil and seasonings. This did not turn out to be the optimum method. I then took the potatoes out and dredged them in this mixture one by one. That was way better - you can see when they are evenly coated, and if there is not enough seasoning on so spots, you can dredge those parts again until it is as you like it. this worked well, and of course one could use different spices than I did. Prior to baking/roasting: I was planning on putting them in a baking dish, but I seem to have misplaced mine, so I used a baking tray with foil on the bottom (makes cleanup easier anyway). Now, the potatoes are in the over at 400 degrees, and I plan on them being there an hour. We'll see! Stay tuned for updates and adjustments! Post script. They are done. My impressions are, that they are very tasty, I am a little surprised. I had only a little salt in the mix, and am surprised that these turned out a little on the salty side doe my tastes. Notice thar in my plans/instructions above, I did not specify how much. I knew these would need some fine tuning, and I will try that soon. The "flesh" of the potatoes is done to perfection, I could not have gotten that better. Half of the skins turned out a little too done I think, the rest were fine. Next time I'll try 55 minutes, or maybe 50! No sense in cooking these any longer than they need. I'll add a picture or two, and perhaps tomorrow, I'll try again and see if I can perfect these. I will say that this is pretty easy, and was worth the effort. Post-post Script. I am adding some pictures from that 1st batch I described above, but I am going to make may second batch tonight. I won't take pictures of that, but I will not observations after I see what the time adjustment does to them. Post-post-post script. Okay! 50 minutes at 400 degrees it is! Perfect doneness, perfect skins. This time too, I was able to get 15 potatoes out of the that 1/4 cup of olive oil! Here is that first batch, going into the oven: Below is the taters just after coming out of the oven. As you can see, the skins wrinkle a little. The foils looks a bit messy. That is because I had just used it to bake two batches of wings. The final image, is to show the interior, the doneness if you can tell by looking.

- 1 reply
-
- 2
-

-
-
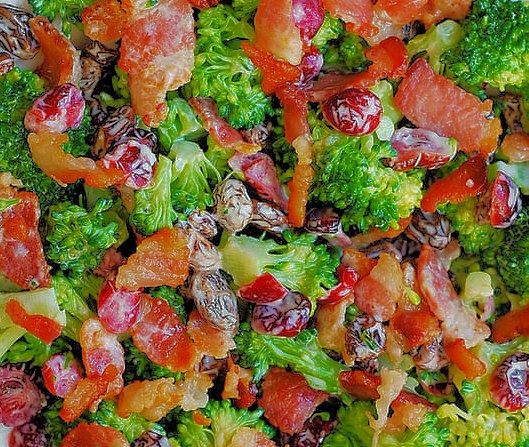
3 bunches of broccoli cut into bite sized pieces 1/2 cup of mayonnaise (or similar substitute) 2 teaspoons of balsamic vinegar (or YOUR favorite kind) 1/3 of a cup of granular sweetener (sugar, Splenda, Stevia, etc.) 1/4 cup of chopped or diced or shredded red onion 1/4 cup of dried cranberries (Craisins) 1 tablespoon of crumbled, cooked bacon (about three strips) Start by mixing the mayo, sweetener and vinegar in the serving bowl (you can use liquid sweeteners if you prefer). You start with this so that the granular sweetener has some time to dissolve. Add the broccoli, onions and bacon. Mix it ll until it all well coated. Refrigerate for at least an hour, then stir again before serving. I will probably return to edit this in the near future, though it is perfectly functional now, you be able to get a good result from this. The most surprising thing about it is how often it gets complemented by those who are not broccoli fans. The proof of there sincerity, it when they ask for seconds.
- 1 reply
-
- 2
-
-
 Gavra Meads joined the club
 -
 Kat70s joined the club
 -
 Jillheil joined the club
 -
 Look so good !!! Thanks Omega and all for sharing.
 -
Victoria9900_22 joined the club
-
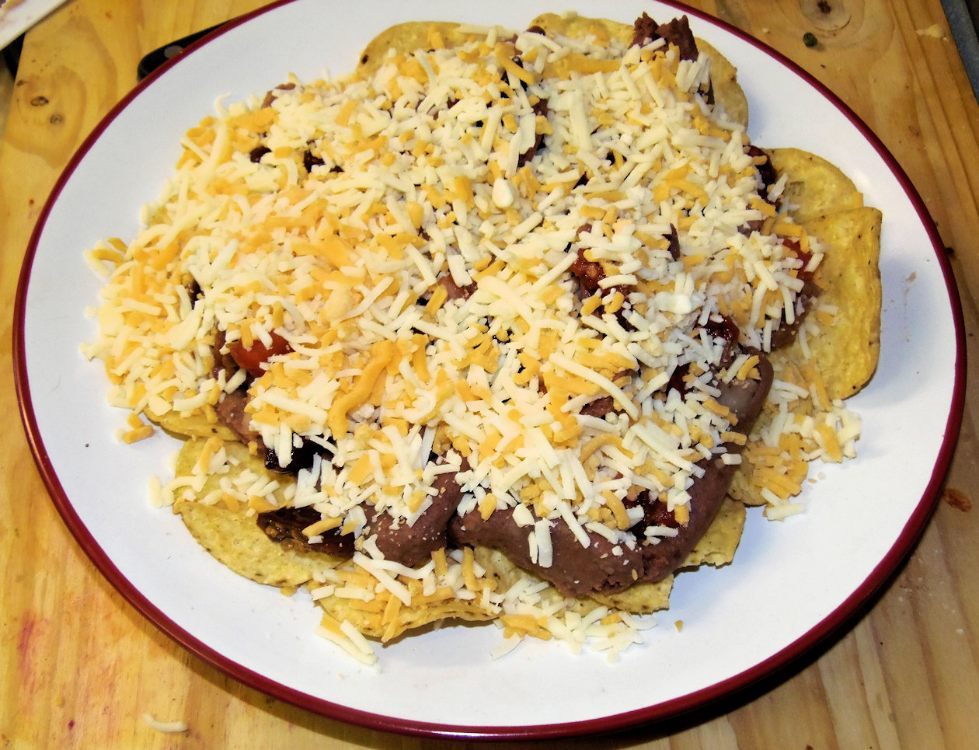
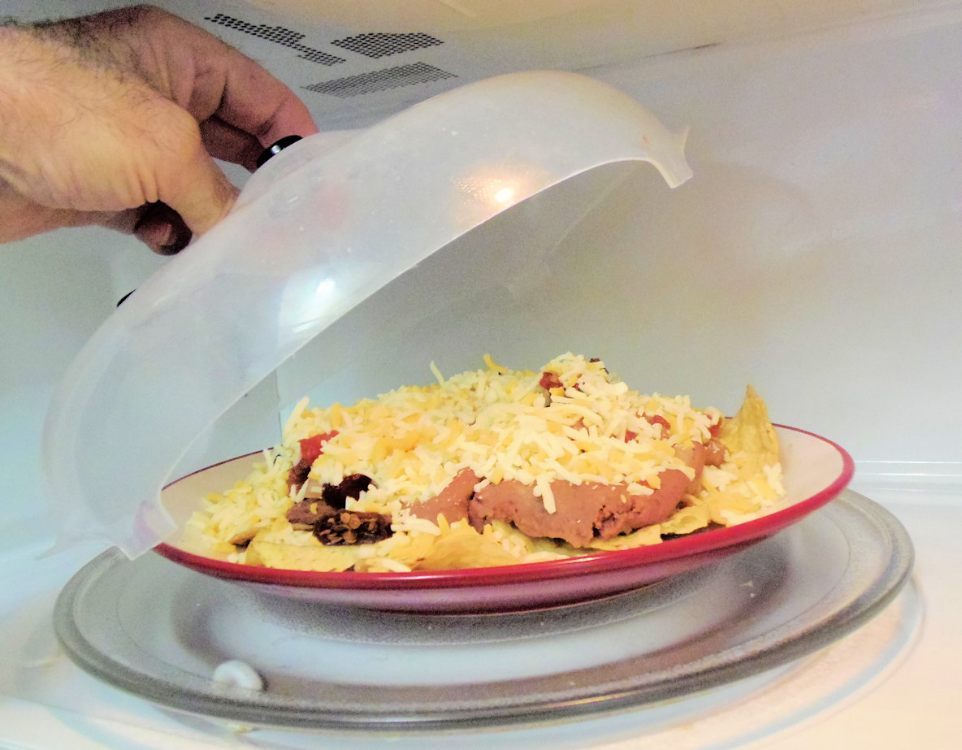
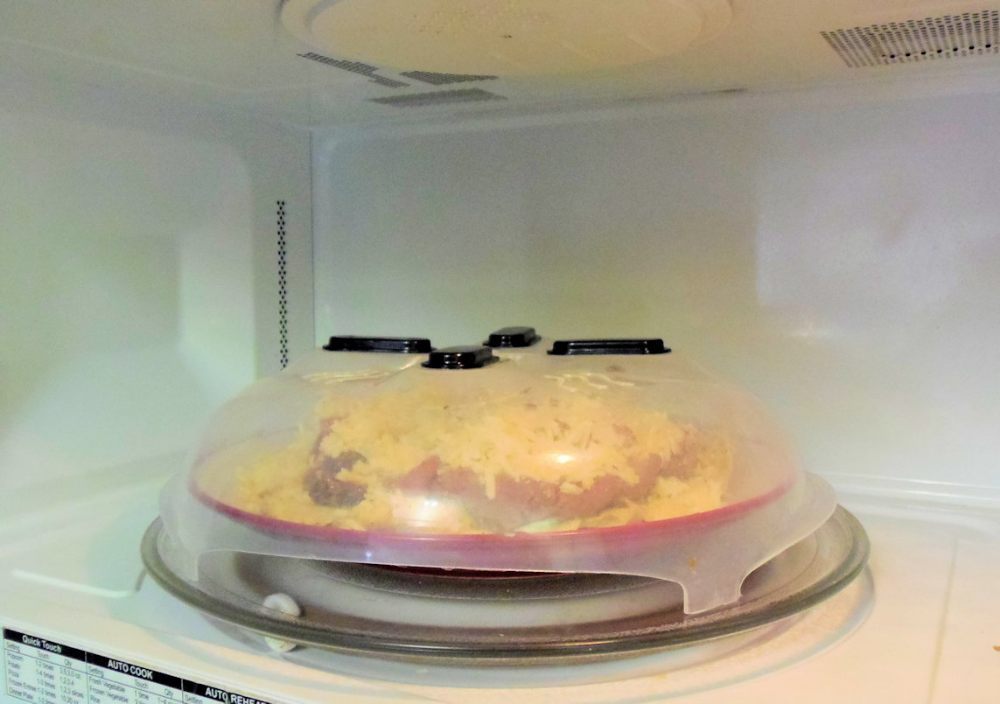
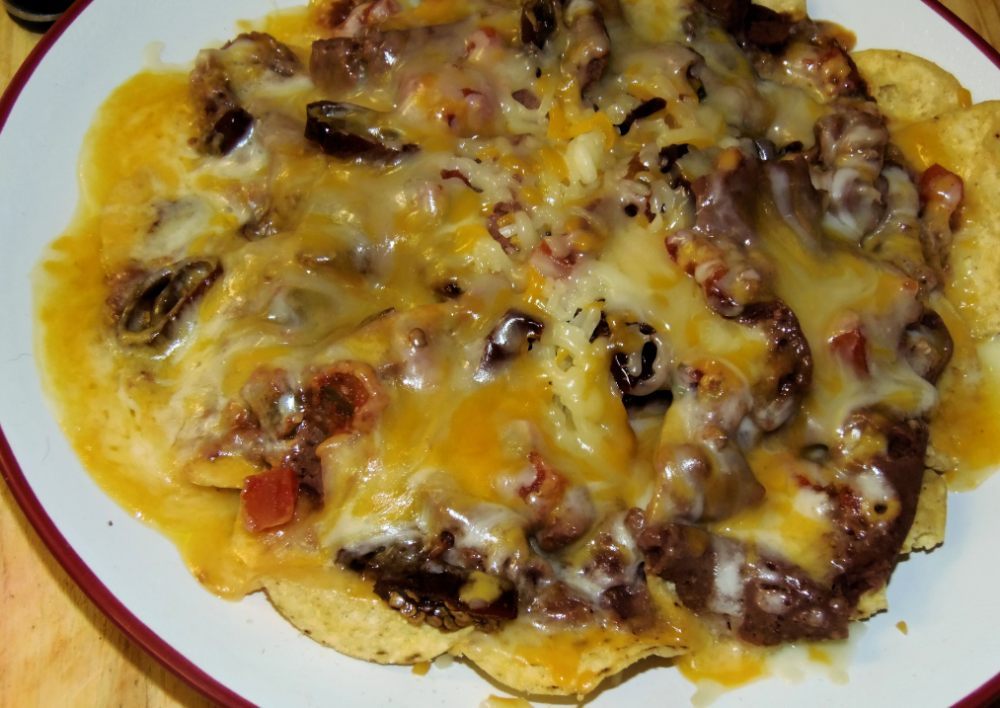
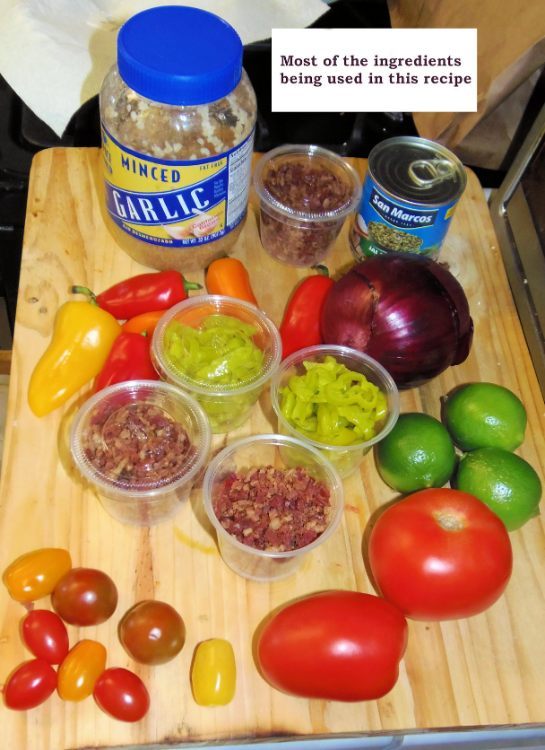
The problem with a section heading of "What is your Favorite Recipe" is that it would not have many entries - only one per person. So, I am doing the liberal translation to "What are some favorite recipes" or even "What recipes are good enough to post?" or "Do you have arecipe that you like a little?" This one fits that last category! I do nachos, several times a month, probably almost once a week. This time I decided to try a variation. I used round tortilla chips (normal for me) and refried red beans. I usually use refried pinto beans, or refried black beans. That black beans are supposedly heathier, bit they tend to have some whole beans in them (I used canned) and those don't squirt through my bean extruder as well. put the beans on the chips, which were spread out on a large plate. To that I added fresh salsa (I almost always have that on hand. Without salsa in my life, I would not be getting enough fruits and vegetables! Then instead of pickled jalapeno nacho slices (my favorite brand of those is La Castina), I shopped up some roasted jalapenos in sweet adobo sauce. Finally, I topped that with shredded cheddar and jack cheese, and into the microwave. I watch through the window until the cheese melted to my liking. Took about 2 minutes and 55 second for this amount in my somewhat underpowered MW oven. One thing I do not like about microwave cooking is it's tendency to splatter some kinds of food (like whole beans), more about that later. Here are most of the ingredients on the plate: Next, the ingredients with cheese added on top: After that, into the microwave: Now, in the picture above and below, I am using a cover over the food, in the microvalve. I have only been using these for a couple of month, and they do a great job. And finally, fit for consumption: The Verdict: Good. In interesting variation from my typical nachos. not better, not worse, just a little different!
-
- 1
-
-
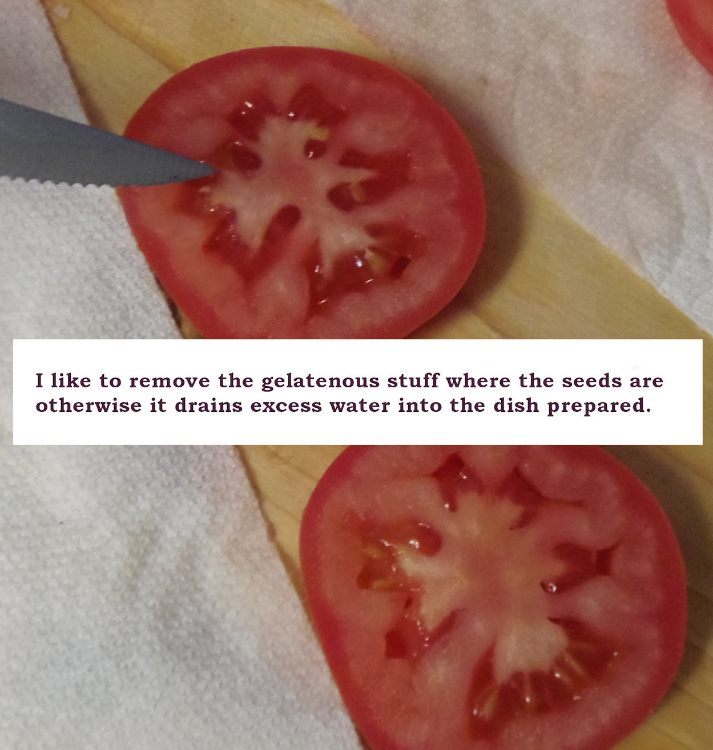
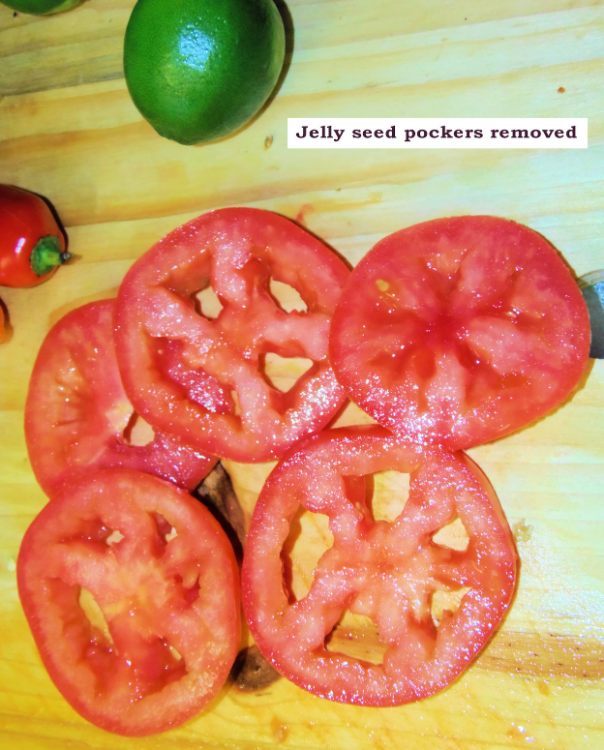
12:30 A.M. Monday 4/4/22 This post is still a work in progress. I think this is all the pictures there will be, but I still need to add some text, and make an updated recipe card. When I am finished, this message will not appear. The recipe card was what I went by as I was making this, it was how I thought it would work in theory. I made some adjustments in the real world as I built the dish, and I will be making some revisions, so stay tuned. When it is finished, the part will be deleted. Oops! I meant pockets (not pockers) above!
-
- 1
-
-
 Ani Tefillah joined the club
 -
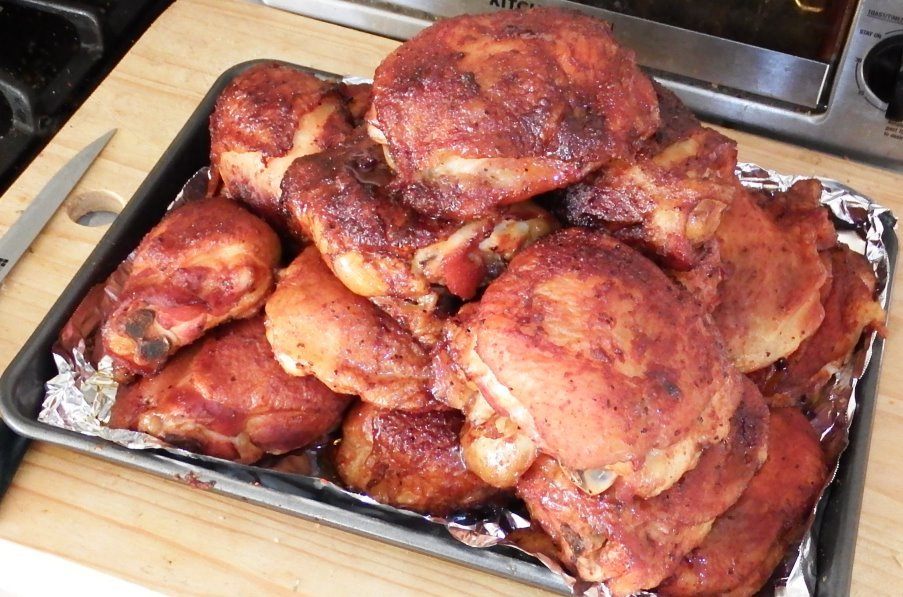
Smoked Chicken Thighs - Flavorful, Tender, Juicy You can use boneless/skinless thighs, or bone in thighs with skin Boneless/skinless are heathier and cook faster. For Boneless/skinless, put your wood pellets into your pellet tray or box. People generally like sweet woods like apple, cherry, or maple. Personally I prefer hickory or mesquite. It is ok to use blends of wood types. Use some sort of stick lighter (use a propane torch) to get the pellets to start smoldering for the smoke (a word of caution here, chicken being smoked attracts neighbors, so you might want to prepare extra, the leftovers are good anyway). Put a heat proof (I use stainless) bowl of water (1 cup of water is enough) on a lower or middle rack in your smoker. Preheat your smoker to 225F. With a brush or your hands, apply a coat of olive oil on all sides of the thighs. Sprinkle a dry rub onto the olive oil, then rub in into the meat. Place the thighs on the rack(s) in your smoker, and insert a temperature probe into the center of your thickest thigh. Close the door/lid of the smoker and wait until the internal temprature of the thigh reaches 165F. That will probably be about an hour and 15 minutes, but it is the temperature, not the time, that is important. I like Weber brand dry rubs. There is their original, smokey brown sugar, savory barbeque, chili lime, KC Barbeque, Sriracha rub, they are all good. There are a lot of rub recipes online, and you might like to do that. I prefer the ease of ready made. You can of course modify rubs with ingredient of your choosing. Notes on bone in and thighs with skin. The bone will require different cooking time and temperature. About two and a half hours and 250 degrees, but you are still going for 165 degrees internal temperature, that is when they are finished. When you do thighs with skin, get the olive oil on under the skin, and sprinkle the rub on, and massage it into the meat as described previously. The skin will be rubbery, edible, but not pleasant in my opinion, that is the main reason I go skinless. You can smoke the thighs in a way that makes the skin crispy, instead of rubbery, but it has to be done at a higher temperature, like 300 to 325, but not all smokers can achieve or maintain that temperature, see: https://meatsmokinghq.com/how-to-avoid-rubbery-skin-on-a-smoked-chicken/ for more details. You may, of course, at a barbeque sauce or a hot wings type of sauce to these in the final cooking time, like the last 10 minutes, giving the sauce some time to solidify a bit and lose some of it's messy-gooey-sticky qualities, unless you like it that way, some do, Can I do this with wings, breasts, drumsticks? Yeah, sort of, but I don't recommend it. Breasts will work, but will take longer to cook, and the meat is always drier and less flavorful. Drumsticks would work in theory, but the difference in thickness from one end to the other, will mean the 'handle end" of the drumstick will have dried out, by the time the meat end is done. Wings? You are on you own here. I have never understood the fascination with wings, they are bones with a tiny about of meat on them, they don't seem worth the effort, but I have not tried them. I anticipate that they would cook quickly, but that quickness would mean that the might not have enough time to get that smokey flavor, and judging their doneness might be a challenge, since there is no thick part to put a temperature probe into.
-
Smoked Chicken Thighs
Omegaman 3.0 replied to Omegaman 3.0's topic in Cooking club's Smokers & related recipes/techniques
12/5/11 After doing a little research, it seems like the rubbery skin is a result of low cooking temperatures, I will make these again & I will try higher temperatures to try to get the skins crispy and edible. If you do not eat the skins anyway, it does not matter. I am not sure, but I think the chicken will be done much quicker at higher temps, but I suspect that will mean less smokiness in the flavor. If I get a better result, I will post it here in this thread. -
Smoked Chicken Thighs
Omegaman 3.0 replied to Omegaman 3.0's topic in Cooking club's Smokers & related recipes/techniques
Just to show you a few things, and add a few things. I just smoked a batch of thighs (16 of them, about 11 pounds) using the instructions above, but with a higher temperature, and a shorter time. The temperature was higher, because I set the thermostat of the smoker to 250 degrees, but apparently, according to my probe, I cooked at 286 degrees, It only took about an hour at 15 minutes to reach the done temperature. The meat was tender, flavorful, and juicy, all white (no pink) and the juices ran clear, so yes, it was done. In this case, the skin came out slightly rubbery, but it was still good. Below are a picture of my wireless meat thermometer, taken in my livingroom while the smoker is in the patio. Handy gadget! The other picture is what the finished thighs looked like.
-
Serves as many as you have chicken for, usually one or two thighs per person, depending on the size of the thighs, and the appetite of the people. Err on the generous side, since leftovers are good, and people may want seconds Smoked Chicken Thighs Chicken Thighs, bone in with skin on Put your chosen rub on and under the skin, and on both (or all) sides. Preheat the smoker to 250 degrees F, and put the chicken on the racks and cook until internal temperature of 165 degrees F is reached, typically 2.5 to 3 hours. This is best done (in my opinion) with a wireless meat thermometer with a probe inserted in the the middle of the thickest part of the largest piece of chicken. I recommend a metal bowl of water in the smoker, to help keep the meat from trying out. I prefer using hickory wood for the smoke, second choice is mesquite but but others may prefer milder or sweeter woods, like apple wood, maple wood, or cherry wood. A mixture of woods is also fine. It will all work, the differences are subtle, not profound. Figure about one tablespoon of rub per pound of chicken. Occasionally check the wood chips to see if they need to be refilled. If you want to use barbeque sauce, you can coat the chicken with the sauce of your choice after they are done. Some guests like them with sauce, some without, so keep that in mind and maybe let them choose as they wish. If using sauce, I like to add it to the thighs during the last 10 minutes of cooking, to let it 'crisp' a little. When the chicken if finished, it is ready to serve, though it should cool some before taking a bite of it. One nice thing about having a temperature probe in the chicken, is at 165 degrees it will be too hot to eat, but you can monitor the chicken temperature to see what it has cooled to. Use your own experience and judgement, but generally it will not burn you under 110 degrees F.
-
 Patticats joined the club
 -
Broccoli / Bacon Salad I have had broccoli salad that my wife made, and it was good. Unfortunately, I do not have her recipe. I looked online for some, and saw two that looked like they had potential, and I adapted features from both and made the following recipe from that. I intended this recipe to serve 16 people. As it turned out, 16 people had the opportunity to try it. Two of the 16 did not try it, one because he does not eat meat, and the other because he will not eat broccoli. Of the 14 who tried it, each one said they liked it, without me asking, all of them had seconds. Four people even contacted me the nest day, to tell me how much they enjoyed it. It has gone on to make 6 more servings since that meal, and there is still some left, so this recipe easily serves 16 people. Cut the recipe in half, and it will easily serve 8! Ingredients 2 large heads broccoli or 4 medium head, cut into florets (about 16 cups or 2-1/2 to 2-3/4 pounds, (Frozen broccoli could probably be used, but it would likely be less crisp.) 2 small or one large red onion (or half and half red and yellow), chopped or diced 12 to 24 slices of bacon, crispy and crumbled (some like more, some less)* (I ended up using to packages of bacon) 2 cups of raisins or dried cranberries, or a combination 1/4 cup (or more) of sunflower seeds or other dried (and salty if you want) salad toppings (nuts, croutons, etc.) For the dressing 1 cup of mayonnaise (or equivalent artificial dressing or ranch, etc.) 2/3 cup of white sugar or equivalent sweetener) 6 tablespoons of red wine vinegar or balsamic vinegar (vinegars taste different, see notes)** Directions (see also the notes at the end). Combine broccoli, onion, bacon, the dried fruit, and sunflower seeds or toppings in a bowl. Mix the mayonnaise (or other dressing), sugar (or alternative sweetener), and the vinegar together in a bowl until dressing is smooth and then pour it over mixture in the other bowl to coat it. The bowl I used was about 10 or 11 inches across at the top, and holds 4 quarts at about an inch and a quarter from the top. Notes *Bacon tip, for easy and less messy bacon cooking, put parchment paper or aluminum foil on a cookie sheet or two, and lay strips of bacon on it (them) side by side). Preheat oven to 400 degrees then bake for 10 to 20 minutes (watch it a little - ovens vary. 20 minutes may overdo it in some ovens, 10 might underdo it in others (the longer times leads to more crispness). Rotate the tray(s) one time to assure even cooking. When finished, take the bacon out of the oven and place the pieces on a paper towels (one plates or trays) to wick away the oil. Ths was the first time I have tried making bacon this way. If I even have to make a lot of bacon again in the future, I won't be doing that any other way, this worked great, was fast, easy, easy to clean up, and it came out great. ** Balsamic tends to be healthier, but you might want to choose a vinegar of another type, you should read about the differences here . I bought 2 kinds of rice vinegar and some balsamic and tried them on the side, and in my opinion, the balsamic tasted better, so that is what I used. Also many like this kind of salad better after it has been refrigerated for a day, so you might want to plan ahead. You should cover and refrigerate the broccoli, onion and dressing portion for a at least a couple of hours, though even that is optional if you are in a rush. You could add the bacon and toppings right before serving if you think some guests might not like those, such as my vegetarian friend, or let your guests add some to their own tastes optionally, but be careful as some guests might use more than their fair share. I hear some people enjoy some of their favorite shredded cheese tossed into this as well. That also could be added to each person's individual tastes when served.
-
mmm sounds great thanks Baltika
-
 FluffyBunny. joined the club
 -
 Everyone in my family makes a version of this delish simple soup that my grandma (nana) made every Shabbat. Friday. If you didn't get it quick, it was gone. A soup pot. 3 tsp of vegetable oil (Enough to lightly cover the bottom of the pan) 1 small bag or regular sized box of pasta. Angel hair (broken up into small pieces) or shells. (I prefer shells because it catches the broth) But you can use any small pasta that you like. 4 Cups of water 2 Cans of tomato sauce. Tsp Salt 1 Tbsp of Knorr Chicken Bouillon or any buillon for that matter (Because the chicken bullion contains a lot of salt you can omit the tsp of salt all together if you like. ( Continually taste the broth until it tastes the way you desire it to.) 2 tsp of granulated garlic powder In a pan or soup pot on low heat add the oil and make sure it covers the bottom of the pan. Add dry pasta, and constantly stir until pasta gets a little brown, not burnt but brown. Some might get a bit burnt that is ok. Just makes sure it is not all burnt. Carefully, And I mean carefully add 4 cups of water and the 2 cans of tomato sauce. Let it simmer for a few mins but constantly stir it. Add 2 tsp of granulated garlic and 1 tbsp of chicken bouillon. Salt to taste or not. Add a pinch of pepper and let it gently boil until the pasta gets fully cooked. Taste tomato broth along the way to make sure that you like it. The pasta will suck up the water so if you like a broth instead of a dry pasta meal add a bit more water. When pasta is fully cooked. Turn stove off and place noodle soup or sopa in a bowl. Garnish with black pepper and or some cheddar cheese. Enjoy Please contact me if you have any questions Thank you Baltika
 -
Thank you so much for this Baltika